The following instructions pertain to the bulk upload of the minimum data necessary for publishing to the Registry. The Credential Engine team encourages users to include any additional information relevant to their outcome(s).
For further instructions or questions, please contact the Publishing team at publishing@credentialengine.org.
Understanding Outcome Data in the Registry
Adding outcome data to the Registry using the Credential Publisher requires using the Bulk Upload Tool to upload and approve two spreadsheets of data.
- Metrics: Information about the metrics used (such as, for example, completion rate or earnings), including their definitions and methods of measurement.
- Outcome Data: The specific outcomes (such as numeric values) of the measurements as applied to the credentials, learning programs, or other resources that are being measured.
- The Data Set Profile describes the data set.
- The Observation is the numerical value for the metric (such as, for example, a percentage of 80, size participation of 145, a size of data of 145).
Each metric that is uploaded to the Credential Publisher will receive a CTID. Once the metrics have been uploaded, make a note of the corresponding CTIDs; you will use these CTIDs in the outcome data spreadsheet to identify the metrics being used.
For this reason, you should start by uploading metrics first.
Uploading Metrics
- Access the Credential Engine Publisher here: https://apps.credentialengine.org/publisher/. Log in using the same login credentials you created in the Accounts System.
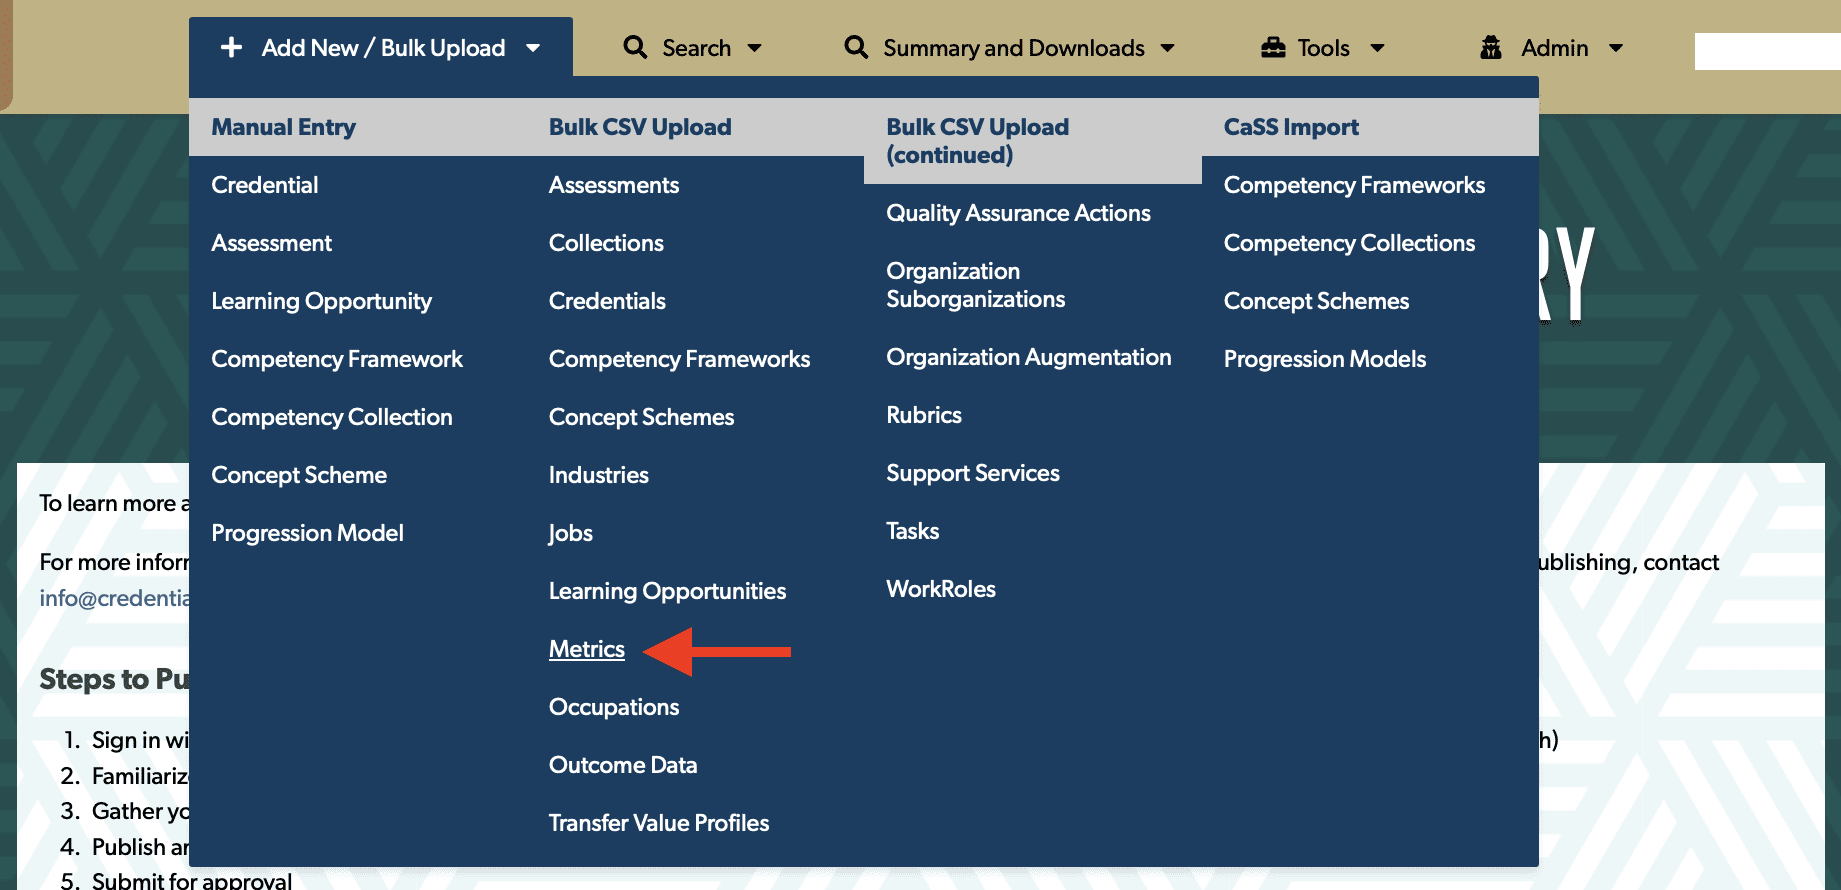
- Click on the dropdown menu labeled ‘Add New/Bulk Upload’ located at the top left of the page. From there, select ‘Metrics’ under the gray ‘Bulk CSV Upload’ subheading to access the Bulk Upload Tool.

- When accessing the Bulk Upload tool, the ‘Select Your Organization’ option will be located at the top of the page. If only one organization is associated with your account in our system, the tool will automatically select the appropriate organization from the dropdown menu. However, if multiple organizations are linked to your account in our system, you will need to choose the correct organization from the dropdown menu.
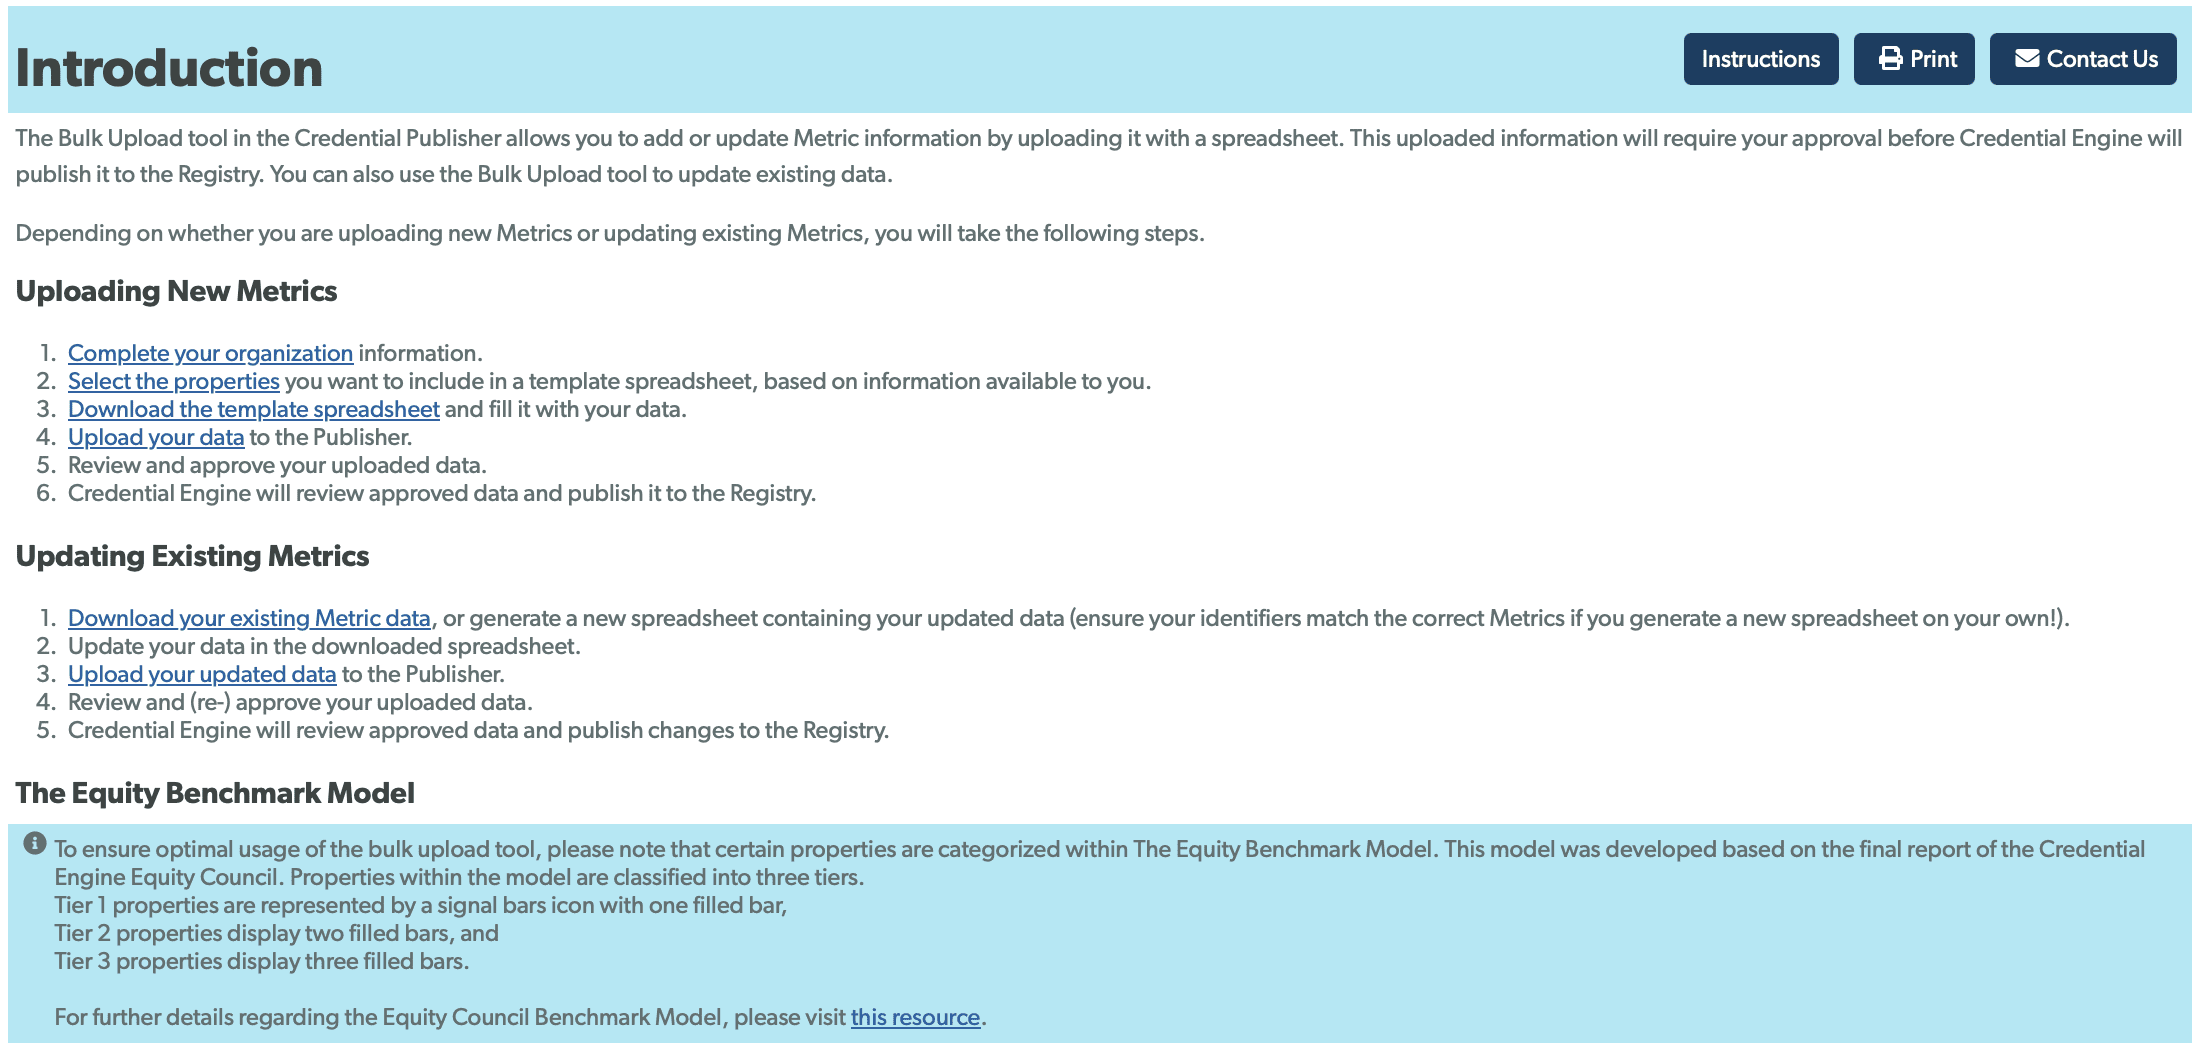
- The ‘Introduction’ offers a concise summary of the steps required for uploading new outcome data, as well as the steps required for updating existing outcome data, in the event that there is a need to modify outcome data previously uploaded to the Publisher.
- The ‘Instructions’ button links users to this website for detailed instructions.
- The ‘Print’ button allows users to print the Bulk Upload instructions. Prior to printing, be sure to expand the relevant sections to capture the necessary information in the PDF.
- The ‘Contact Us’ button is available for assistance with the Bulk Upload Tool.
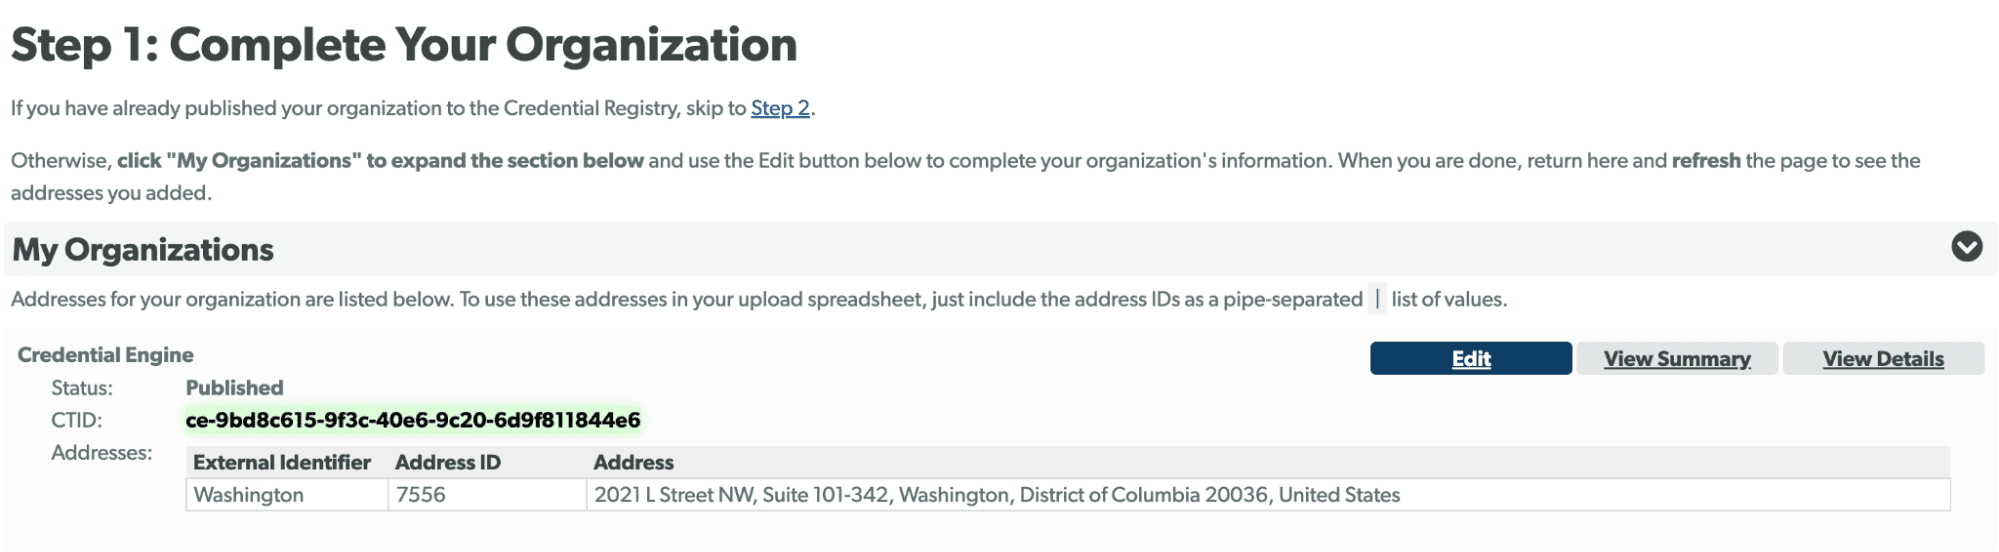
- Under ‘Step 1: Complete your Organization,’ click the ‘My Organizations’ tab to expand the section. In this section, you will be able to make edits to your organizational data directly from this tab.
- Under ‘Step 2: Select Your Properties,’ you will choose the properties that you want to include in your template. The default selection in the tool is ‘Upload New Metrics,’ but you also have the option to update existing outcomes once the data is in the Registry.
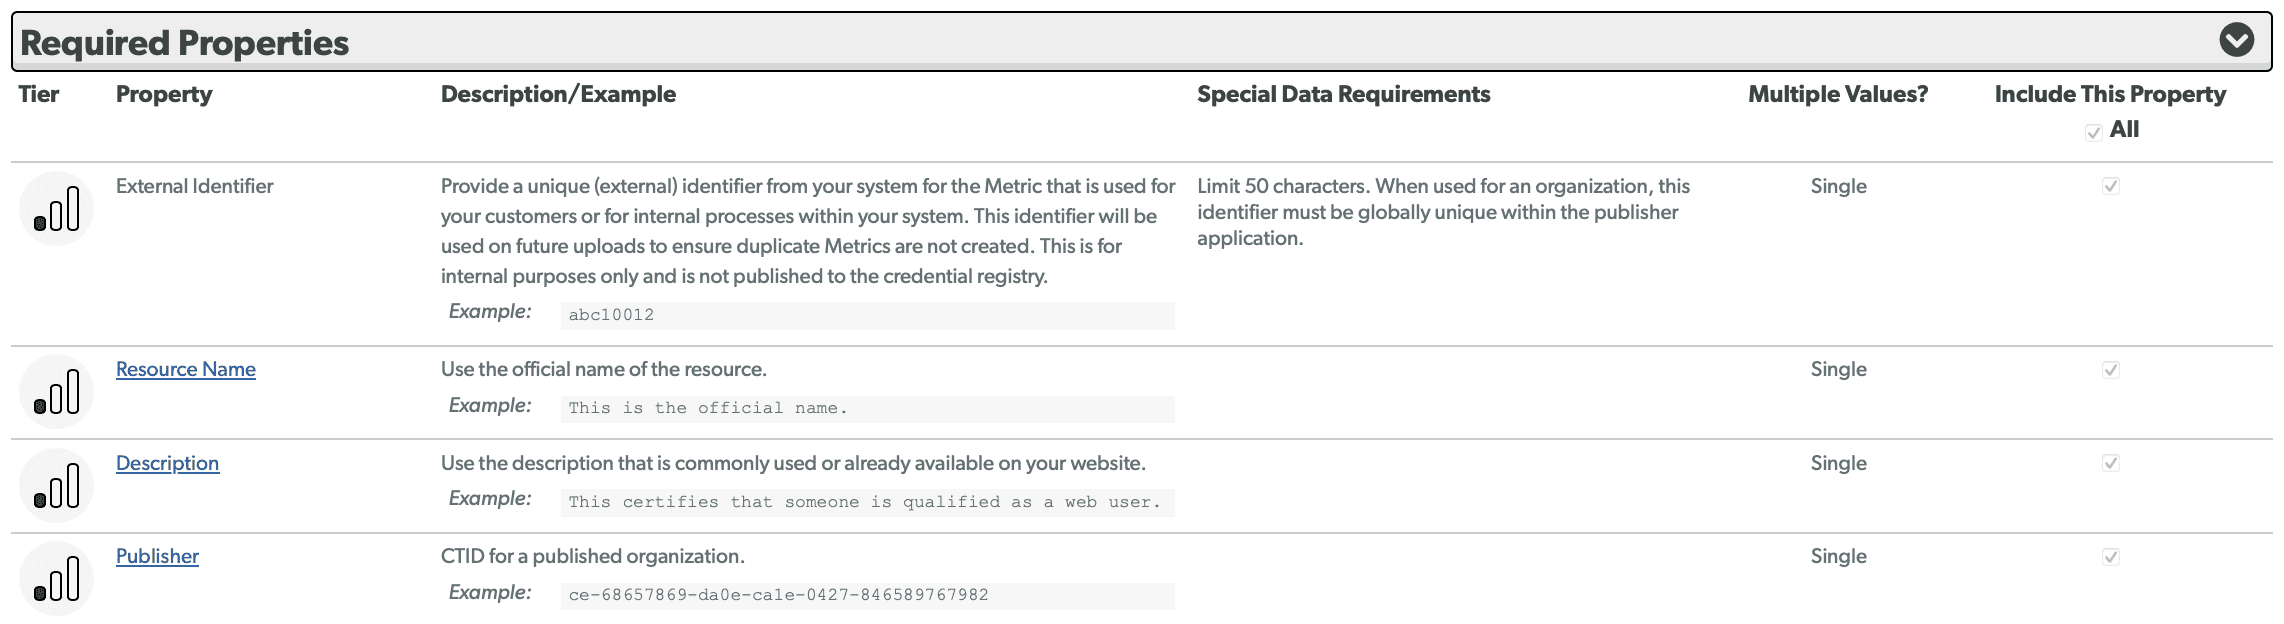
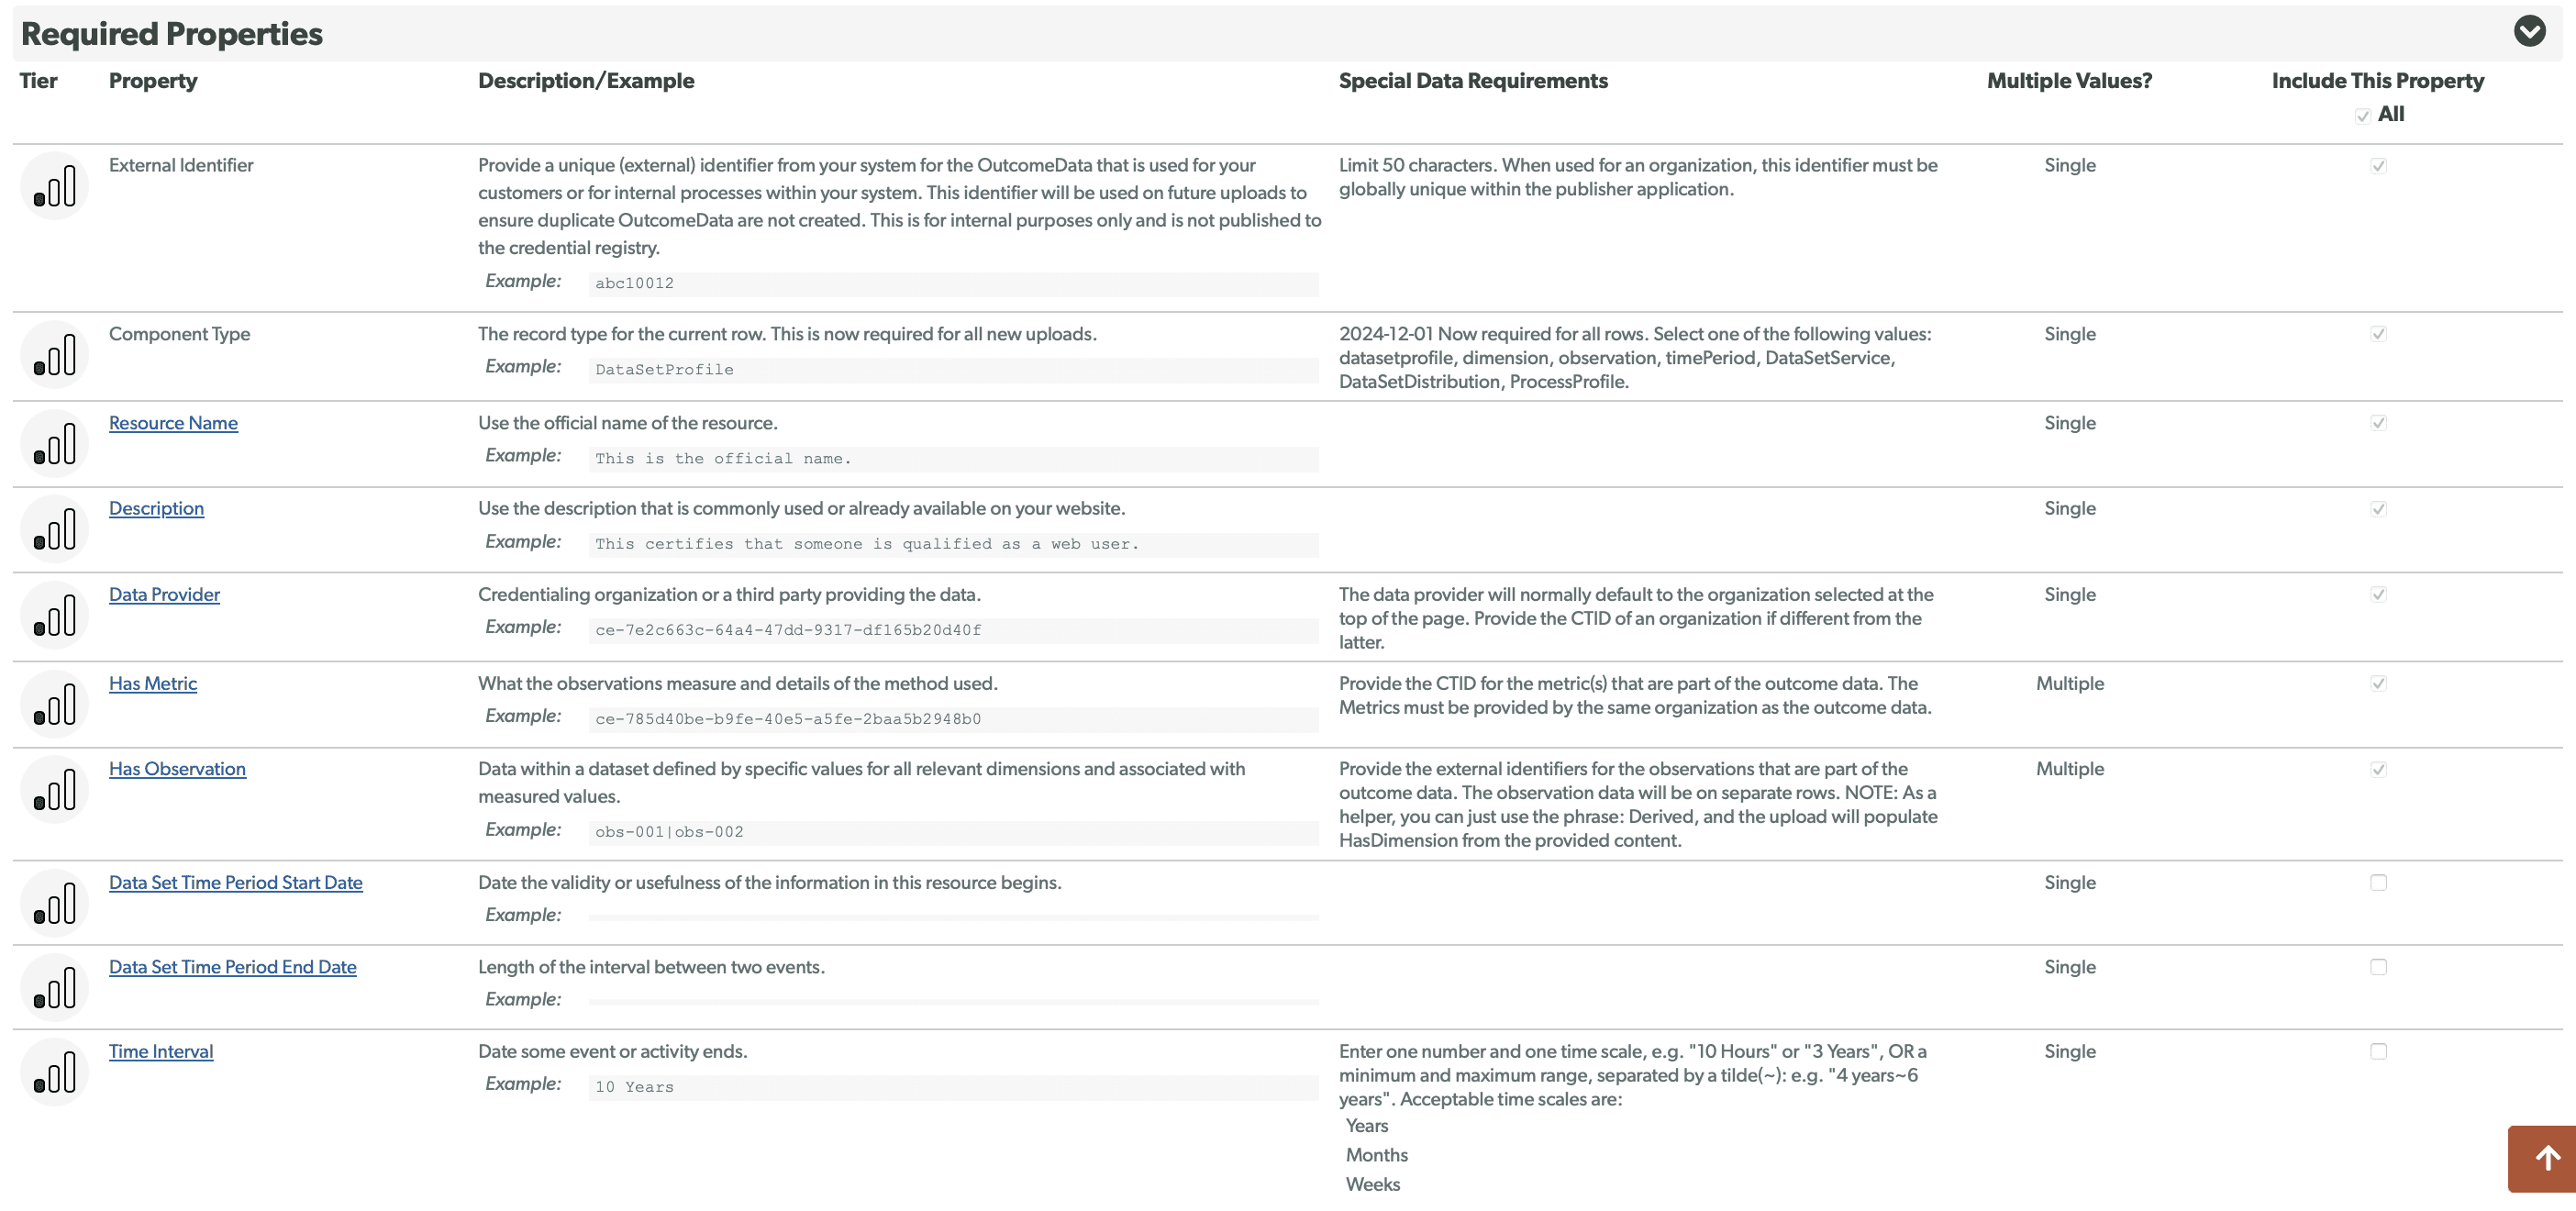
- Expand the ‘Required Properties’ tab. These properties are integral to our Minimum Data Policy, required for publishing, and have been preselected for your convenience. As a result, they will automatically be included in your spreadsheet when you download it. Furthermore, they are categorized as Tier 1 Equity Benchmark data, which is indicated by a signal icon featuring one bar next to each property.
- Within each tab on the Bulk Upload Tool, you will find detailed information for each property, including a description, an example of the required data, and specific formatting requirements for the data in the spreadsheet.
- (Optional) Expand the other tabs and choose any extra properties you wish to include in your data. Although these additional properties are not required to publish, Credential Engine encourages publishers to publish past the Minimum Data Policy.
- Under ‘Step 3: Download Your Template Spreadsheet,’ make sure to check both ‘Include Sample Data’ and ‘Include Instructions’ to include sample data and instructions. Then, click on the ‘Download Template Spreadsheet’ button. Please note that the template will be downloaded as a .csv file. Open the file as a Google Sheet or Excel spreadsheet to easily input data.
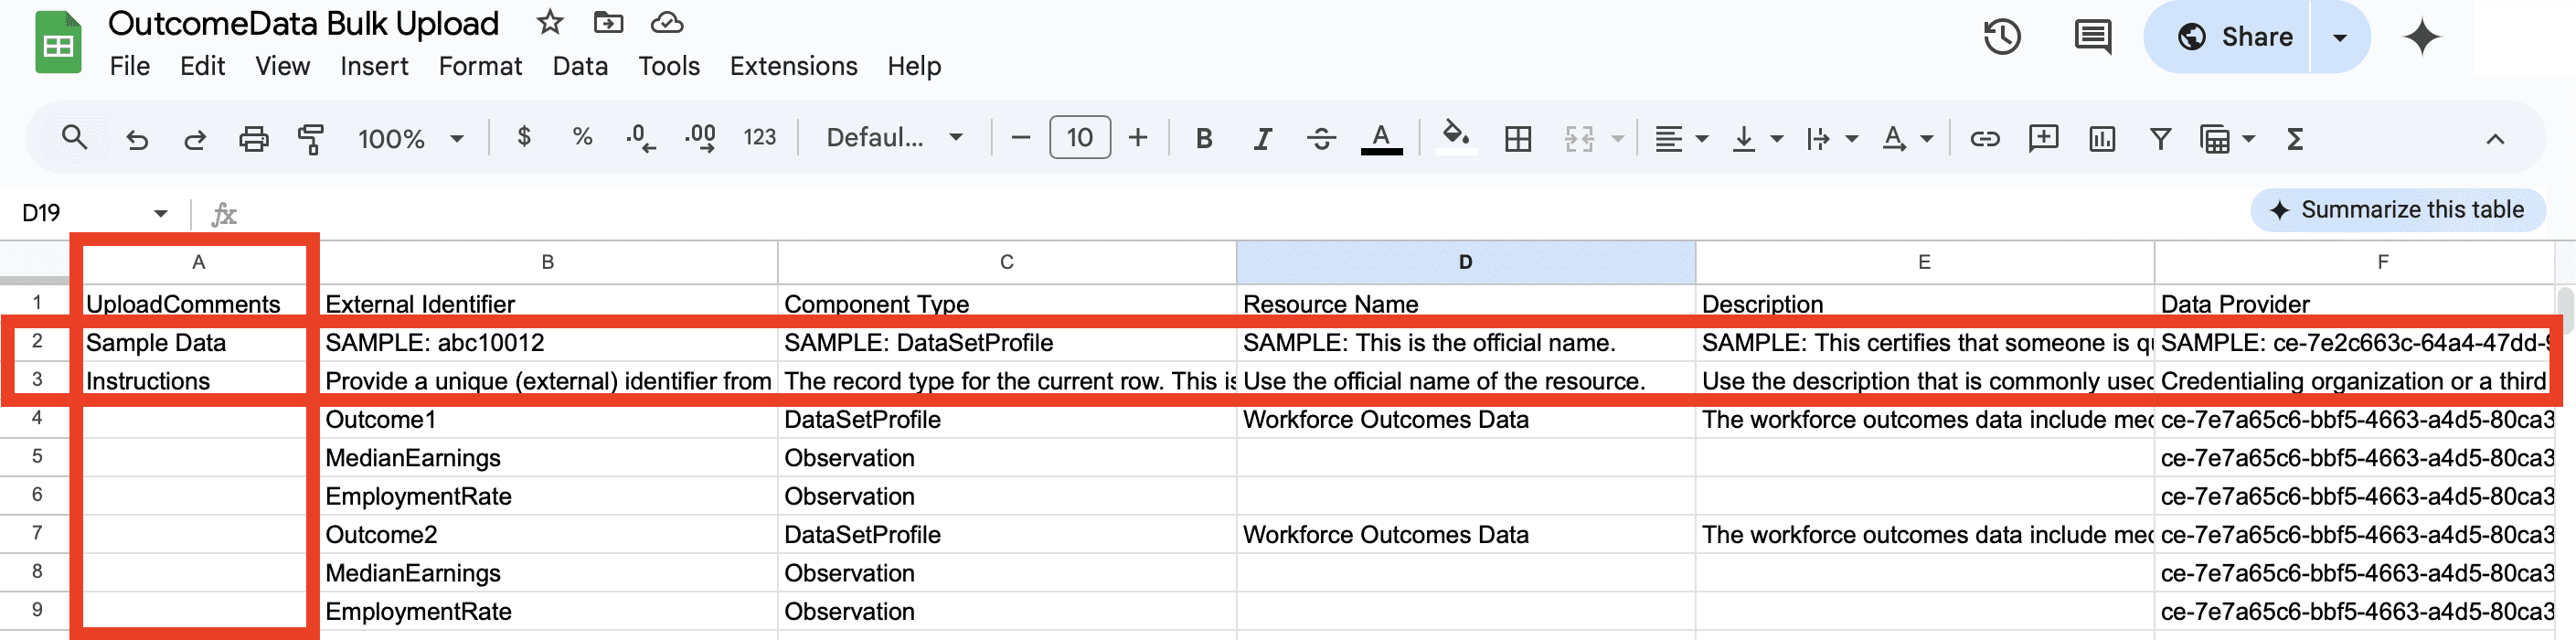
- The template contains sample data and instructions for each property in Rows 2 and 3, allowing you to refer to them in the spreadsheet. In Row 1, the column headers correspond to the properties you selected in ‘Step 2: Select Your Properties.’
- Additional guidance on filling out the outcome spreadsheet can be found under ‘Step 4: Populate Your Template Spreadsheet’ on the Bulk Upload Tool.
- After completing the template, remove column A, along with the sample data and instructions in Rows 2 and 3. Ensure that these are deleted before uploading to avoid errors. Remember to save the file with a .csv file extension, as that format is compatible with our system.
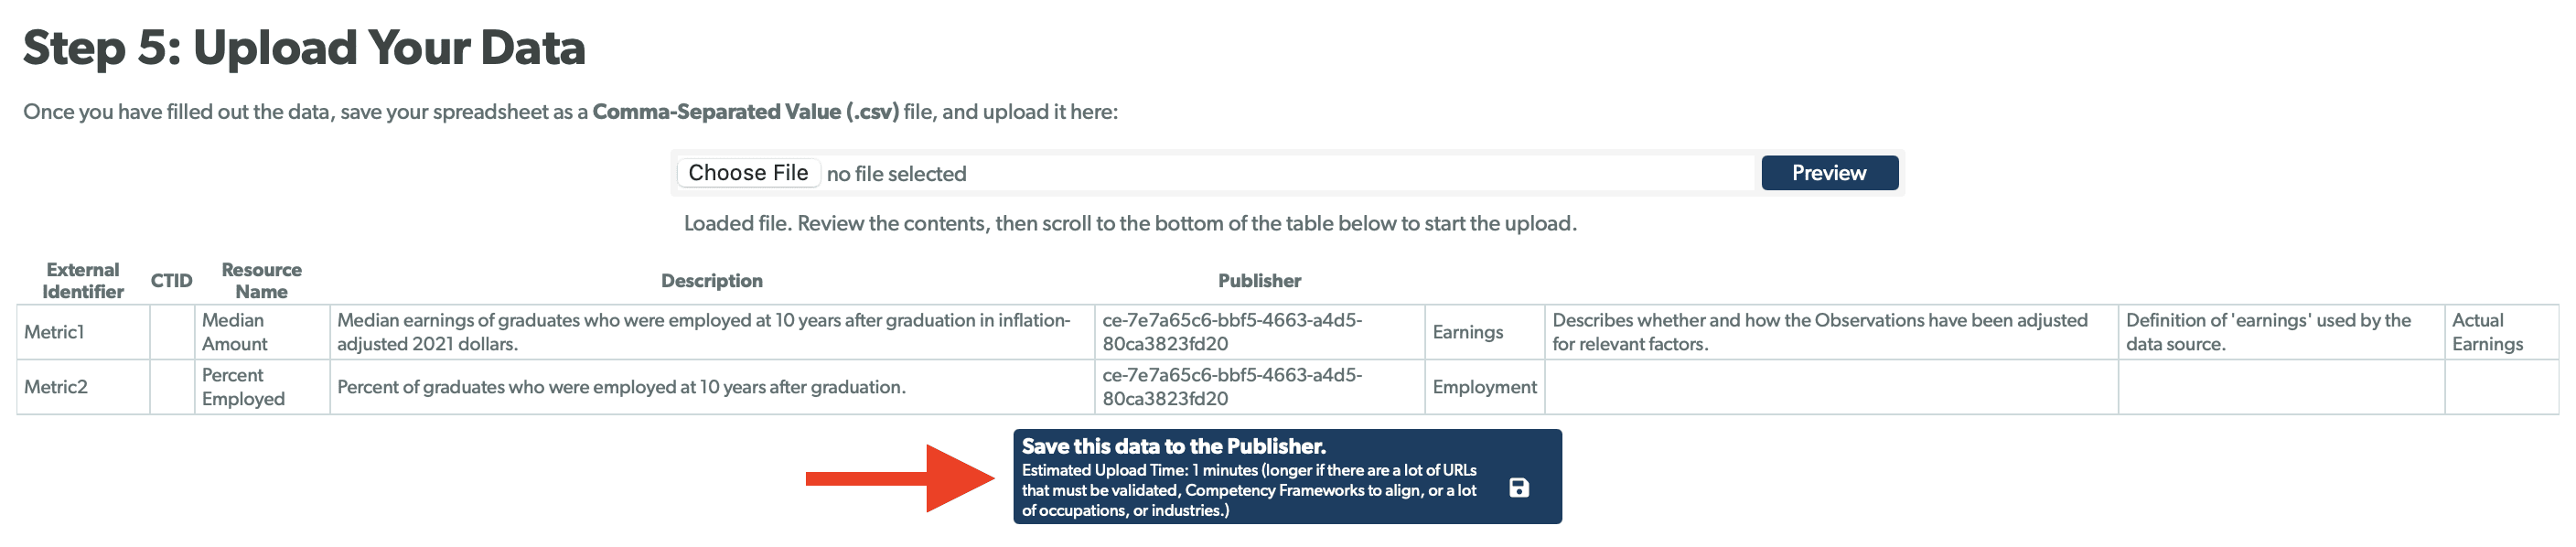
- Under ‘Step 5: Upload Your Data’ on the Bulk Upload Tool, select ‘Choose File’ to pick the spreadsheet from your computer. Click ‘Preview’ to review the data before proceeding. The tool will replicate your spreadsheet with the properties as column headers and all your data organized under these columns. When you are ready to upload, click the ‘Save this Data to the Publisher’ button.
- After uploading the data, you will receive a notification when the system has completed processing. If the upload was successful, this notification will include an upload summary showing the data that was successfully added. If any errors are encountered during the upload, no updates will be made. Correct the errors and then redo the upload.
- After entering your data, the next step is to approve your data to be published. (See “Approving Metrics and Outcome Data” section below.)


Uploading Outcome Data
Follow steps 1-5 above, selecting Outcome Data (instead of Metrics) in the dropdown menu (step 2).
- In the Bulk Upload tool, under ‘Step 2: Select Your Properties,’ you will choose the properties that you want to include in your template. The default selection in the tool is ‘Upload New Outcome Data,’ but you also have the option to update existing outcomes once the data is in the Registry.
- Expand the ‘Instructions’ tab. Read these instructions closely to understand how to correctly stage your outcome data in the spreadsheet that you download.
- Expand the ‘Required Properties’ tab. These properties are required for the DataSetProfile and are integral to our Minimum Data Policy, required for publishing, and have been preselected for your convenience. As a result, they will automatically be included in your spreadsheet when you download it. Furthermore, they are categorized as Tier 1 Equity Benchmark data, which is indicated by a signal icon featuring one bar next to each property.
- Within each tab on the Bulk Upload Tool, you will find detailed information for each property, including a description, an example of the required data, and specific formatting requirements for the data in the spreadsheet.
- (Optional) Expand the ‘Recommended Benchmark Properties’ tab and choose any extra properties you wish to include in the DataSetProfile for your data. Although these additional properties are not required to publish, Credential Engine encourages publishers to publish past the Minimum Required Data Policy.
- (Optional) If your data includes dimensions, expand the ‘Dimension’ tab and choose any dimension properties you wish to include. Read the ‘Dimension Notes’ in the green text box for additional information.
- Expand the ‘Observation’ tab. At least one observation is required for each DataSetProfile. You must select at least one property you wish to include for observations. Read the ‘Observation Notes’ in the green text box for additional information.
- (Optional) If your data includes dimensions, you may include time periods to refer to a period-related point in a dimension. Expand the ‘Time Periods’ tab and select the properties you would like to include. Either TimeInterval or StartDate and EndDate must be provided.
- (Optional) Expand the ‘Optional Properties’ tab and choose any extra DataSetProfile properties you wish to include for your data.
- (Optional) Expand the ‘DataSet Distribution’ and ‘DataSet Service’ tabs if you would like to add additional information about the distribution and services of the data.
- Under ‘Step 3: Download Your Template Spreadsheet,’ make sure to check both ‘Include Sample Data’ and ‘Include Instructions’ to include sample data and instructions. Then, click on the ‘Download Template Spreadsheet’ button. Please note that the template will be downloaded as a .csv file. Open the file as a Google Sheet or Excel spreadsheet to easily input data.
- The template contains sample data and instructions for each property in Rows 2 and 3, allowing you to refer to them in the spreadsheet. In Row 1, the column headers correspond to the properties you selected in ‘Step 2: Select Your Properties.’
- Additional guidance on filling out the outcome spreadsheet can be found under ‘Step 4: Populate Your Template Spreadsheet’ on the Bulk Upload Tool.
- After completing the template, remove column A, along with the sample data and instructions in Rows 2 and 3. Ensure that these are deleted before uploading to avoid errors. Remember to save the file with a .csv file extension, as that format is compatible with our system.
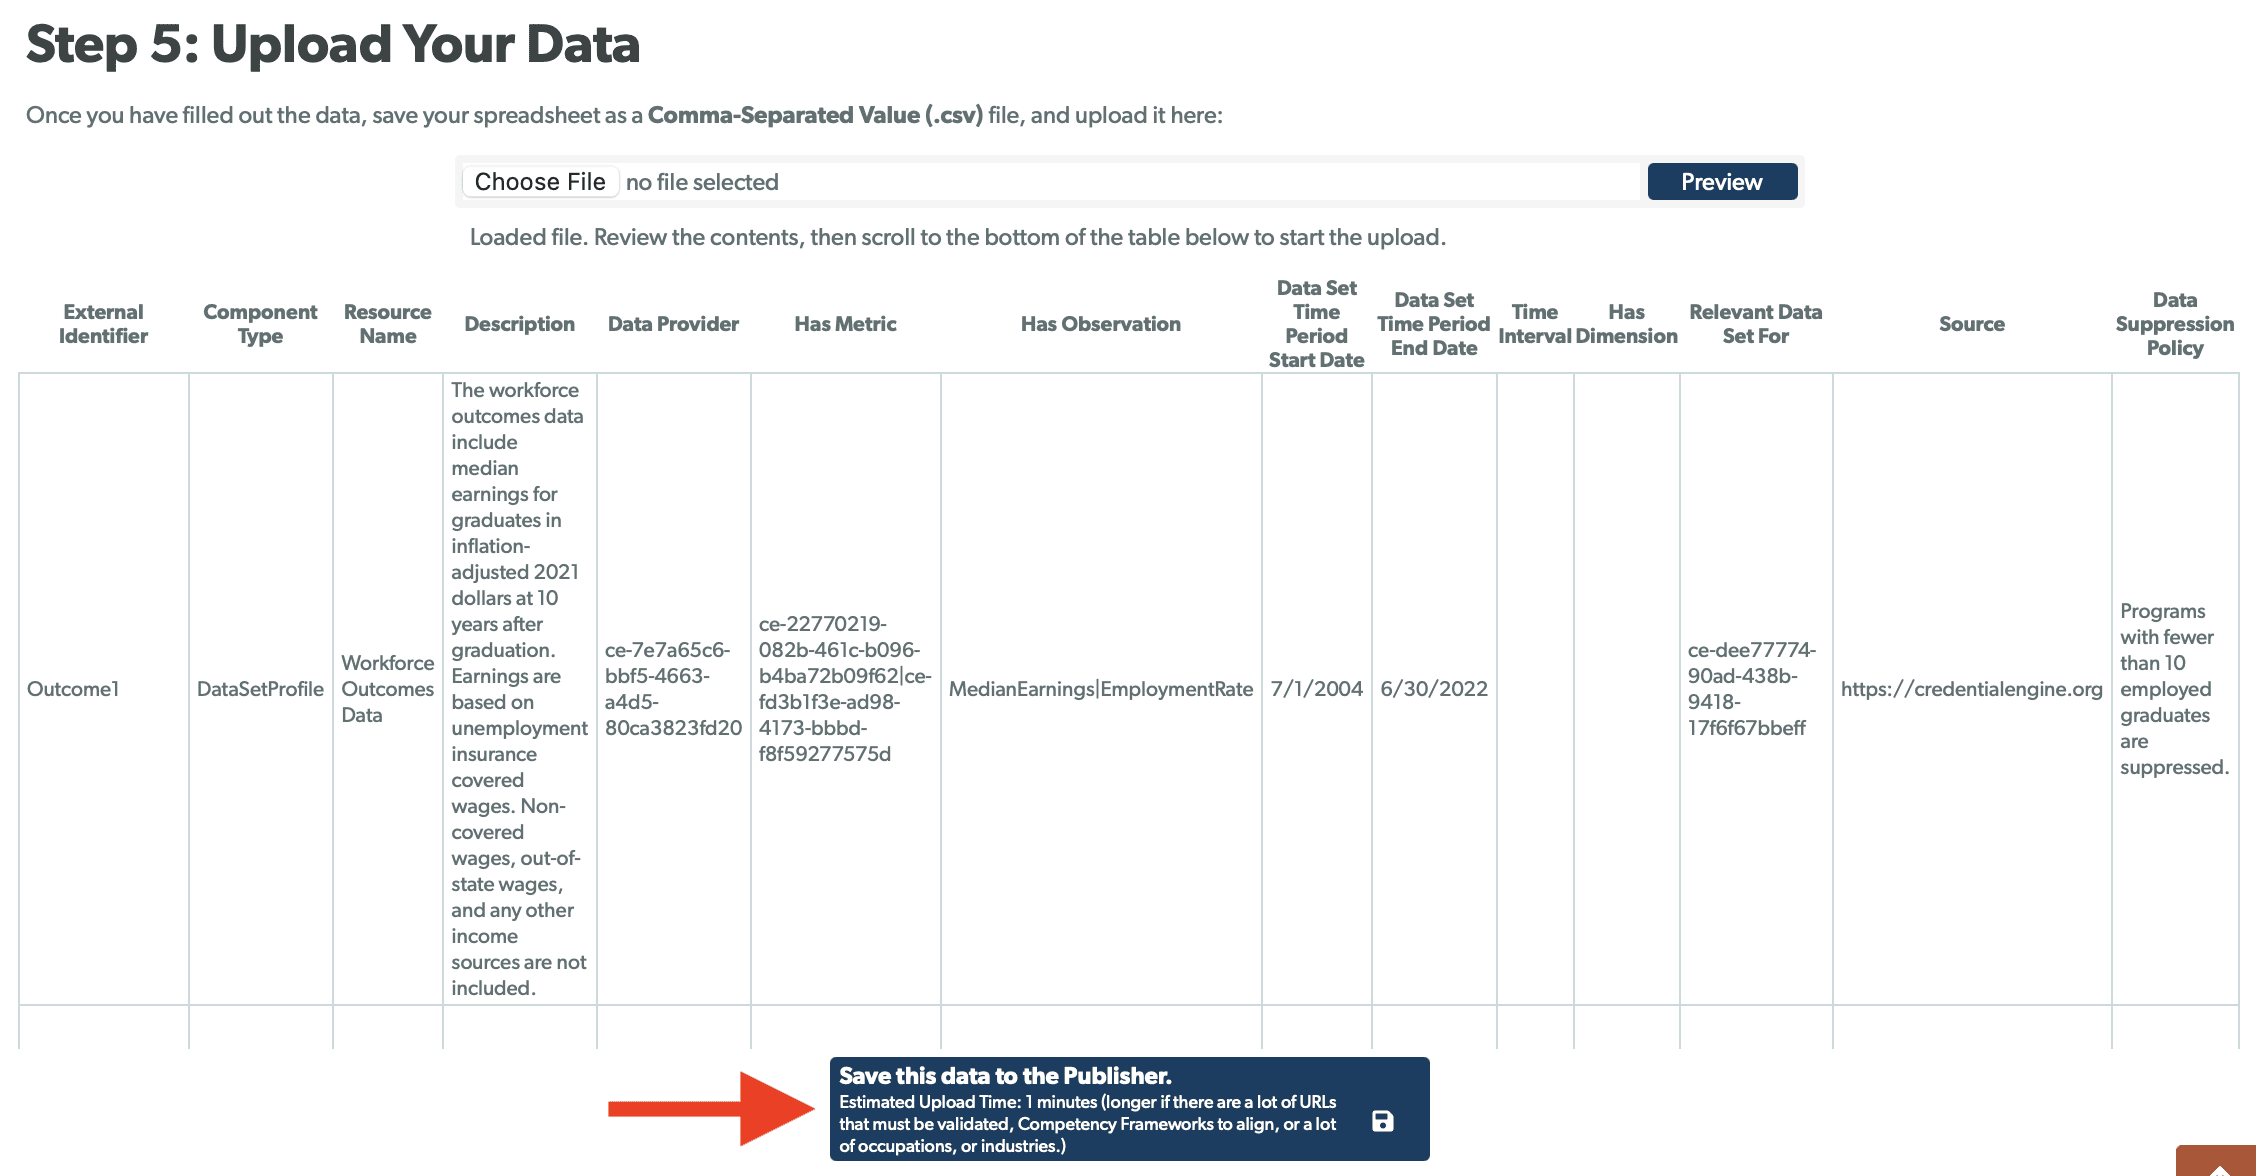
- Under ‘Step 5: Upload Your Data’ on the Bulk Upload Tool, select ‘Choose File’ to pick the spreadsheet from your computer. Click ‘Preview’ to review the data before proceeding. The tool will replicate your spreadsheet with the properties as column headers and all your data organized under these columns. When you are ready to upload, click the ‘Save this Data to the Publisher’ button.
- After uploading the data, you will receive a notification when the system has completed processing. If the upload was successful, this notification will include an upload summary showing the data that was successfully added. If any errors are encountered during the upload, no updates will be made. Correct the errors and then redo the upload.
- After entering your data, the next step is to approve your data to be published.


Approving Outcome Data
Once you have successfully uploaded your spreadsheets for metrics and outcome data, you must approve the data in the Credential Publisher.
- Under ‘Step 6: Approve Your Outcome Data,’ click on the blue link to your Organization Summary Page.
- On your Organization Summary Page, select the tab for ‘Metrics or ‘Outcome Data’. This will display all of your uploaded data for metrics or outcomes. To easily approve each set of data, select the ‘Select All’ button located on the right-hand side of the screen. This will select all the data to be approved at one time. Once the data has been selected, click on the green ‘Approve All Selected Items’ button located at the bottom of the screen. Please note that our system will not allow approval of metrics or outcome data unless your organization has been approved and published. If your organization has not yet been approved, select the ‘My Organization’ tab and click on the ‘Approve my Organization’ button. Following approval, the Credential Engine team will publish your organization to the Registry. Once you receive email notification that your organization has been published, you will be allowed to approve your outcome data.
- Upon approval of the data, the Credential Engine team will automatically be notified of the approval to be published. Once published to the registry, you will receive an email notification. Your data will be available on the Credential Finder in about 30 minutes.

